Measure soil moisture - Raspberry Pi
In this part of the lesson, you will add a capacitive soil moisture sensor to your Raspberry Pi, and read values from it.
Hardware
The Raspberry Pi needs a capacitive soil moisture sensor.
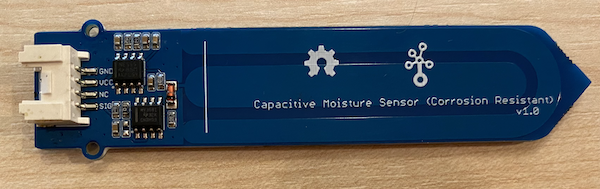
The sensor you'll use is a Capacitive Soil Moisture Sensor, that measures soil moisture by detecting the capacitance of the soil, a property than changes as the soil moisture changes. As the soil moisture increases, the voltage decreases.
This is an analog sensor, so uses an analog pin, and the 10-bit ADC in the Grove Base Hat on the Pi to convert the voltage to a digital signal from 1-1,023. This is then sent over I2C via the GPIO pins on the Pi.
Connect the soil moisture sensor
The Grove soil moisture sensor can be connected to the Raspberry Pi.
Task - connect the soil moisture sensor
Connect the soil moisture sensor.
-
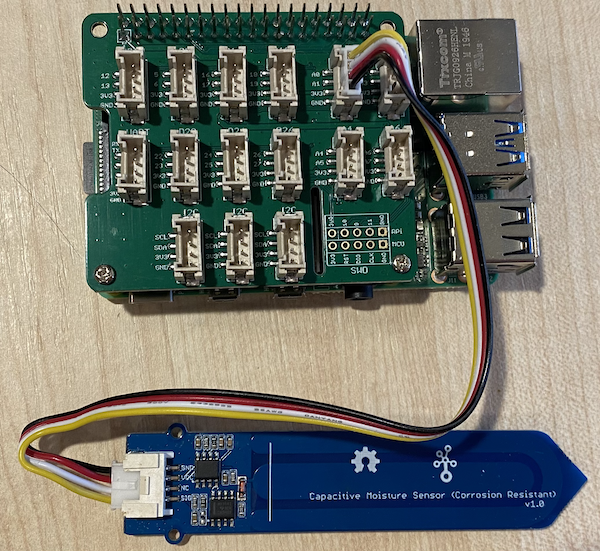
Insert one end of a Grove cable into the socket on the soil moisture sensor. It will only go in one way round.
-
With the Raspberry Pi powered off, connect the other end of the Grove cable to the analog socket marked A0 on the Grove Base hat attached to the Pi. This socket is the second from the right, on the row of sockets next to the GPIO pins.
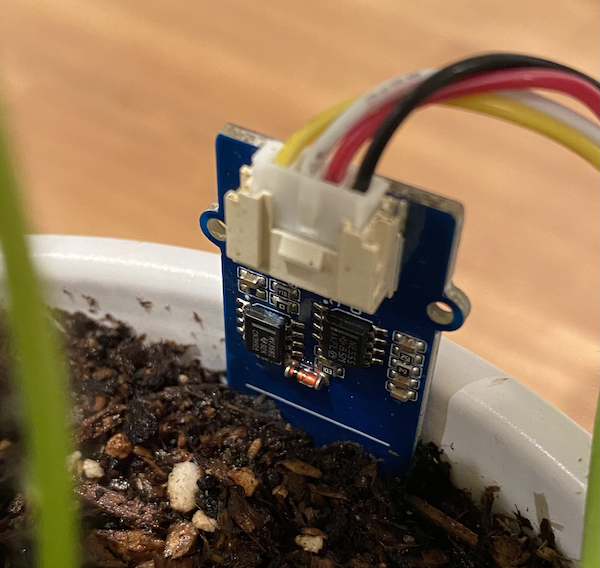
- Insert the soil moisture sensor into soil. It has a 'highest position line' - a white line across the sensor. Insert the sensor up to but not past this line.
Program the soil moisture sensor
The Raspberry Pi can now be programmed to use the attached soil moisture sensor.
Task - program the soil moisture sensor
Program the device.
-
Power up the Pi and wait for it to boot
-
Launch VS Code, either directly on the Pi, or connect via the Remote SSH extension.
⚠️ You can refer to the instructions for setting up and launch VS Code in nightlight - lesson 1 if needed.
-
From the terminal, create a new folder in the
piusers home directory calledsoil-moisture-sensor. Create a file in this folder calledapp.py. -
Open this folder in VS Code
-
Add the following code to the
app.pyfile to import some required libraries:import time
from grove.adc import ADCThe
import timestatement imports thetimemodule that will be used later in this assignment.The
from grove.adc import ADCstatement imports theADCfrom the Grove Python libraries. This library has code to interact with the analog to digital converter on the Pi base hat and read voltages from analog sensors. -
Add the following code below this to create an instance of the
ADCclass:adc = ADC() -
Add an infinite loop that reads from this ADC on the A0 pin, and write the result to the console. This loop can then sleep for 10 seconds between reads.
while True:
    soil_moisture = adc.read(0)
    print("Soil moisture:", soil_moisture)

time.sleep(10) -
Run the Python app. You will see the soil moisture measurements written to the console. Add some water to the soil, or remove the sensor from the soil, and see the value change.
pi@raspberrypi:~/soil-moisture-sensor $ python3 app.py
Soil moisture: 615
Soil moisture: 612
Soil moisture: 498
Soil moisture: 493
Soil moisture: 490
Soil Moisture: 388
In the example output above, you can see the voltage drop as water is added.
💁 You can find this code in the code/pi folder.
😀 Your soil moisture sensor program was a success!