Translate speech - Raspberry Pi
In this part of the lesson, you will write code to translate text using the translator service.
Convert text to speech using the translator service
The speech service REST API doesn't support direct translations, instead you can use the Translator service to translate the text generated by the speech to text service, and the text of the spoken response. This service has a REST API you can use to translate the text.
Task - use the translator resource to translate text
-
Your smart timer will have 2 languages set - the language of the server that was used to train LUIS (the same language is also used to build the messages to speak to the user), and the language spoken by the user. Update the
languagevariable to be the language that will be spoken by the user, and add a new variable calledserver_languagefor the language used to train LUIS:language = '<user language>'
server_language = '<server language>'Replace
<user language>with the locale name for language you will be speaking in, for examplefr-FRfor French, orzn-HKfor Cantonese.Replace
<server language>with the locale name for language used to train LUIS.You can find a list of the supported languages and their locale names in the Language and voice support documentation on Microsoft docs.
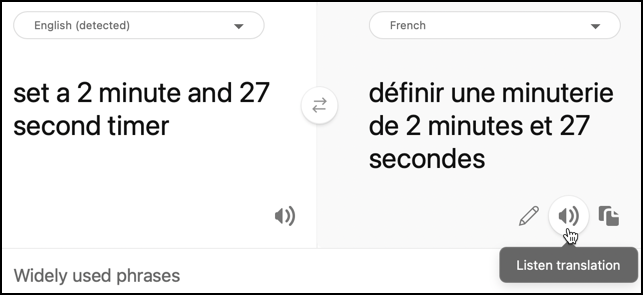
💁 If you don't speak multiple languages you can use a service like Bing Translate or Google Translate to translate from your preferred language to a language of your choice. These services can then play audio of the translated text.
For example, if you train LUIS in English, but want to use French as the user language, you can translate sentences like "set a 2 minute and 27 second timer" from English into French using Bing Translate, then use the Listen translation button to speak the translation into your microphone.
-
Add the translator API key below the
speech_api_key:translator_api_key = '<key>'Replace
<key>with the API key for your translator service resource. -
Above the
sayfunction, define atranslate_textfunction that will translate text from the server language to the user language:def translate_text(text, from_language, to_language):The from and to languages are passed to this function - your app needs to convert from user language to server language when recognizing speech, and from server language to user language when provided spoken feedback.
-
Inside this function, define the URL and headers for the REST API call:
url = f'https://api.cognitive.microsofttranslator.com/translate?api-version=3.0'

headers = {
    'Ocp-Apim-Subscription-Key': translator_api_key,
    'Ocp-Apim-Subscription-Region': location,
    'Content-type': 'application/json'
}
The URL for this API is not location specific, instead the location is passed in as a header. The API key is used directly, so unlike the speech service there is no need to get an access token from the token issuer API.
-
Below this define the parameters and body for the call:
params = {
    'from': from_language,
    'to': to_language
}

body = [{
    'text' : text
}]
The
paramsdefines the parameters to pass to the API call, passing the from and to languages. This call will translate text in thefromlanguage into thetolanguage.The
bodycontains the text to translate. This is an array, as multiple blocks of text can be translated in the same call. -
Make the call the REST API, and get the response:
response = requests.post(url, headers=headers, params=params, json=body)The response that comes back is a JSON array, with one item that contains the translations. This item has an array for translations of all the items passed in the body.
[
    {
        "translations": [
            {
                "text": "Set a 2 minute 27 second timer.",
                "to": "en"
            }
        ]
    }
] -
Return the
testproperty from the first translation from the first item in the array:return response.json()[0]['translations'][0]['text'] -
Update the
while Trueloop to translate the text from the call toconvert_speech_to_textfrom the user language to the server language:if len(text) > 0:
print('Original:', text)
text = translate_text(text, language, server_language)
print('Translated:', text)
message = Message(json.dumps({ 'speech': text }))
device_client.send_message(message)This code also prints the original and translated versions of the text to the console.
-
Update the
sayfunction to translate the text to say from the server language to the user language:def say(text):
print('Original:', text)
text = translate_text(text, server_language, language)
print('Translated:', text)
speech = get_speech(text)
play_speech(speech)This code also prints the original and translated versions of the text to the console.
-
Run your code. Ensure your function app is running, and request a timer in the user language, either by speaking that language yourself, or using a translation app.
pi@raspberrypi:~/smart-timer $ python3 app.py
Connecting
Connected
Using voice fr-FR-DeniseNeural
Original: Définir une minuterie de 2 minutes et 27 secondes.
Translated: Set a timer of 2 minutes and 27 seconds.
Original: 2 minute 27 second timer started.
Translated: 2 minute 27 seconde minute a commencé.
Original: Times up on your 2 minute 27 second timer.
Translated: Chronométrant votre minuterie de 2 minutes 27 secondes.
💁 Due to the different ways of saying something in different languages, you may get translations that are slightly different to the examples you gave LUIS. If this is the case, add more examples to LUIS, retrain then re-publish the model.
💁 You can find this code in the code/pi folder.
😀 Your multilingual timer program was a success!