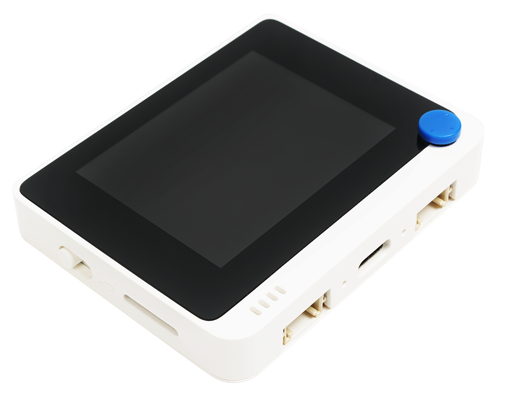
Wio Terminal
The Wio Terminal by Seeed Studios is an Arduino-compatible microcontroller featuring built-in WiFi, sensors, and actuators. It also includes ports for additional sensors and actuators through the Grove hardware ecosystem.
Setup
To get started with your Wio Terminal, you need to install some free software on your computer and update the Wio Terminal firmware to enable WiFi connectivity.
Task - setup
Install the necessary software and update the firmware.
-
Install Visual Studio Code (VS Code), the editor for writing device code in C/C++. Refer to the VS Code documentation for installation instructions.
💁 Another popular IDE for Arduino development is the Arduino IDE. If you are already familiar with this tool, you can use it instead of VS Code and PlatformIO, but the lessons will provide instructions based on using VS Code.
-
Install the VS Code PlatformIO extension, which supports programming microcontrollers in C/C++. Refer to the PlatformIO extension documentation for installation instructions. This extension requires the Microsoft C/C++ extension, which is installed automatically with PlatformIO.
-
Connect your Wio Terminal to your computer using the USB-C port on the bottom. The Wio Terminal comes with a USB-C to USB-A cable, but if your computer only has USB-C ports, you will need a USB-C cable or a USB-A to USB-C adapter.
-
Follow the instructions in the Wio Terminal Wiki WiFi Overview documentation to set up your Wio Terminal and update the firmware.
Hello World
Creating a 'Hello World' application is a traditional way to start with a new programming language or technology. This small application outputs the text "Hello World" to verify that all tools are correctly configured.
The Hello World app for the Wio Terminal ensures that you have Visual Studio Code installed correctly with PlatformIO and set up for microcontroller development.
Create a PlatformIO project
The first step is to create a new project using PlatformIO configured for the Wio Terminal.
Task - create a PlatformIO project
Create the PlatformIO project.
-
Connect the Wio Terminal to your computer
-
Launch Visual Studio Code
-
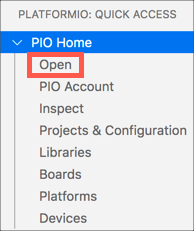
Locate the PlatformIO icon on the side menu bar:

Click on this menu item, then select PIO Home -> Open
-
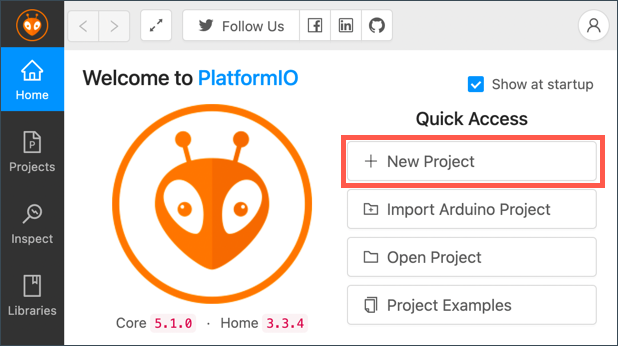
From the welcome screen, click the + New Project button
-
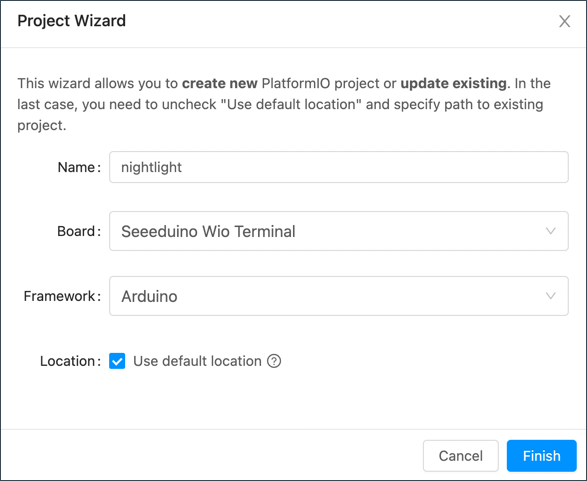
Configure your project in the Project Wizard:
-
Name your project
nightlight -
In the Board dropdown, type
WIOto filter the boards, and select Seeeduino Wio Terminal -
Keep the Framework as Arduino
-
Either keep the Use default location checkbox checked, or uncheck it and choose a location for your project
-
Click the Finish button
PlatformIO will download the necessary components to compile code for the Wio Terminal and create your project. This process may take a few minutes.
-
Explore the PlatformIO project
The VS Code explorer will display several files and folders created by the PlatformIO wizard.
Folders
.pio- This directory contains temporary data required by PlatformIO, such as libraries or compiled code. It is automatically recreated if deleted, and you don't need to include this in source code control when sharing your project on platforms like GitHub..vscode- This directory holds the configuration files used by PlatformIO and VS Code. It is automatically recreated if deleted, and you don't need to include this in source code control when sharing your project on platforms like GitHub.include- This directory is for external header files needed when adding additional libraries to your code. You won't be using this directory in any of these lessons.lib- This directory is for external libraries that you want to call from your code. You won't be using this directory in any of these lessons.src- This directory contains the main source code for your application. Initially, it will contain a single file -main.cpp.test- This directory is where you would put any unit tests for your code.
Files
-
main.cpp- This file in thesrcdirectory contains the entry point for your application. Open this file, and it will contain the following code:#include <Arduino.h>
void setup() {
// put your setup code here, to run once:
}
void loop() {
// put your main code here, to run repeatedly:
}When the device starts up, the Arduino framework will run the
setupfunction once, then run theloopfunction repeatedly until the device is turned off. -
.gitignore- This file lists the files and directories to be ignored when adding your code to git source code control, such as uploading to a repository on GitHub. -
platformio.ini- This file contains configuration for your device and app. Open this file, and it will contain the following code:[env:seeed_wio_terminal]
platform = atmelsam
board = seeed_wio_terminal
framework = arduinoThe
[env:seeed_wio_terminal]section has configuration for the Wio Terminal. You can have multipleenvsections so your code can be compiled for multiple boards.The other values match the configuration from the project wizard:
platform = atmelsamdefines the hardware that the Wio Terminal uses (an ATSAMD51-based microcontroller).board = seeed_wio_terminaldefines the type of microcontroller board (the Wio Terminal).framework = arduinodefines that this project is using the Arduino framework.
Write the Hello World app
You're now ready to write the Hello World app.
Task - write the Hello World app
Write the Hello World app.
-
Open the
main.cppfile in VS Code. -
Change the code to match the following:
#include <Arduino.h>

void setup()
{
    Serial.begin(9600);

    while (!Serial)
        ; // Wait for Serial to be ready

    delay(1000);
}

void loop()
{
    Serial.println("Hello World");
    delay(5000);
}
The
setupfunction initializes a connection to the serial port - in this case, the USB port that is used to connect the Wio Terminal to your computer. The parameter9600is the baud rate (also known as Symbol rate), or speed that data will be sent over the serial port in bits per second. This setting means 9,600 bits (0s and 1s) of data are sent each second. It then waits for the serial port to be ready.The
loopfunction sends the lineHello World!to the serial port, so the characters ofHello World!along with a new line character. It then sleeps for 5,000 milliseconds or 5 seconds. After theloopends, it is run again, and again, and so on all the time the microcontroller is powered on. -
Put your Wio Terminal into upload mode. You will need to do this every time you upload new code to the device:
-
Pull down twice quickly on the power switch - it will spring back to the on position each time.
-
Check the blue status LED to the right hand side of the USB port. It should be pulsing.

Click the image above for a video showing how to do this.
-
-
Build and upload the code to the Wio Terminal.
-
Open the VS Code command palette.
-
Type
PlatformIO Uploadto search for the upload option, and select PlatformIO: Upload.
PlatformIO will automatically build the code if needed before uploading.
-
The code will be compiled and uploaded to the Wio Terminal.
💁 If you are using macOS, a notification about a DISK NOT EJECTED PROPERLY will appear. This is because the Wio Terminal gets mounted as a drive as part of the flashing process, and it is disconnected when the compiled code is written to the device. You can ignore this notification.
⚠️ If you get errors about the upload port being unavailable, first make sure you have the Wio Terminal connected to your computer, and switched on using the switch on the left hand side of the screen, and set into upload mode. The green light on the bottom should be on, and the blue light should be pulsing. If you still get the error, pull the on/off switch down twice in quick succession again to force the Wio Terminal into upload mode and try the upload again.
-
PlatformIO has a Serial Monitor that can monitor data sent over the USB cable from the Wio Terminal. This allows you to monitor the data sent by the Serial.println("Hello World"); command.
-
Open the VS Code command palette.
-
Type
PlatformIO Serialto search for the Serial Monitor option, and select PlatformIO: Serial Monitor.
A new terminal will open, and the data sent over the serial port will be streamed into this terminal:
> Executing task: platformio device monitor <

--- Available filters and text transformations: colorize, debug, default, direct, hexlify, log2file, nocontrol, printable, send_on_enter, time
--- More details at http://bit.ly/pio-monitor-filters
--- Miniterm on /dev/cu.usbmodem101  9600,8,N,1 ---
--- Quit: Ctrl+C | Menu: Ctrl+T | Help: Ctrl+T followed by Ctrl+H ---
Hello World
Hello World
Hello Worldwill print to the serial monitor every 5 seconds.
💁 You can find this code in the code/wio-terminal folder.
😀 Your 'Hello World' program was a success!